
Just received my propboard and uploaded the pbsaber sketch and it uploaded successfully, but I had no pins connected to anything so I never truly tested it. Today I reconfigured the pins for the lower voltage setting and made my own sketch. The sketch compiles, but does not upload to the board. I get error: “avrdude: stk500v2_ReceiveMessage(): timeout”. I checked my soldering to make sure i had no accidental solder bridges and everything was okay. I configured it back to the high voltage setting, but still the same error. My computer recognizes the device when I connect my board to the computer and I have the correct port selected. Tried uploading on a different computer and using different USB cables, but still get the same error. How do I fix this?
Hello @Ryan_Pelo,
Strange. We have had a case of a user where the bootloader was erased, but couldn’t reproduce it here. So let’s try to re-upload the bootloader to see if it solves the problem you have. Here’s how to do it:
-
Download the STM32 Flasher from here: FLASHER-STM32 - STM32 Flash loader demonstrator (UM0462) (replaced by STM32CubeProgrammer) - STMicroelectronics (blue button at the bottom of the page), and install it.
-
Unplug the PropBoard from any power supply.
-
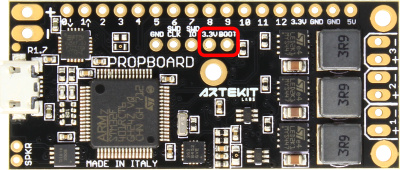
Join the 3.3V and BOOT (pins within the red rectangle in the picture here below). You can use some SMD tweezers, for example. Keep this connection until step 8.
-
While joining the 3.3V and BOOT pins, connect the USB cable, and wait at least 5 seconds.
-
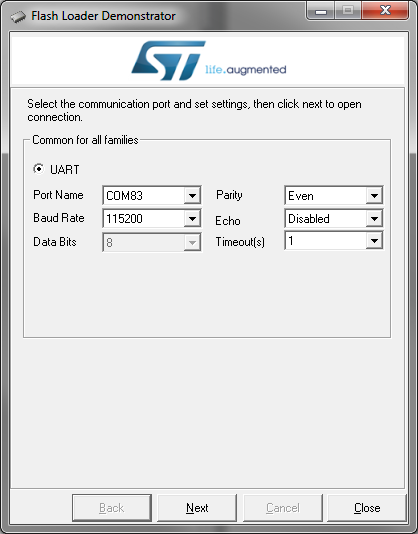
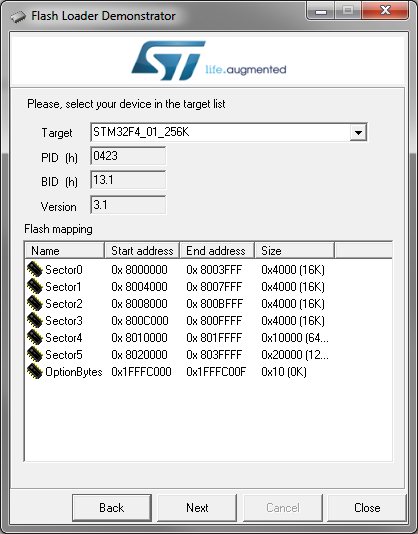
Open the STM32 Flash Load Demonstrator. It should show a screen like the following:
-
Select the serial port for the PropBoard. Set the Timeout to 1 second as in the picture here above. Then click “Next”.
-
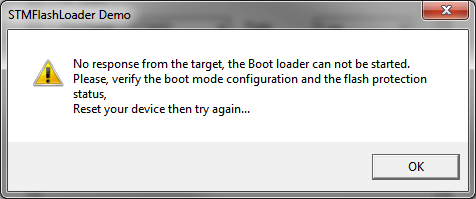
If it fails, click OK and press “Next” again without unplugging the board (on some PCs it fails the first time). If it keeps failing, unplug the USB and try again from step 3.
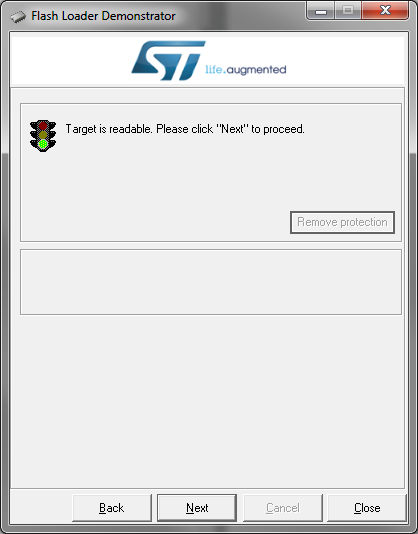
- If you see the following screen, you can remove the connection between the 3.3V and BOOT pins. Click “Next”
- Here click “Next” again
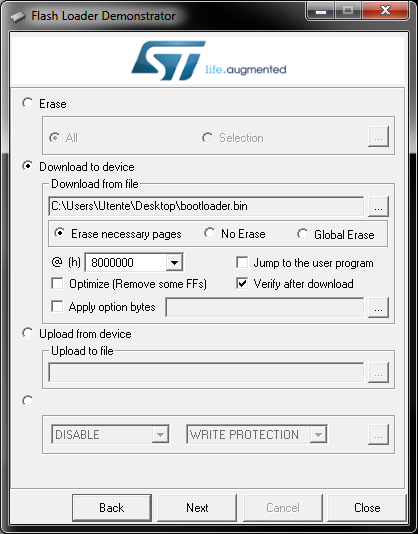
- In the following screen choose “Download to device” and select the bin file attached at the bottom if this post. Select also “Verify after download”. Make sure everything is like the picture here below and click “Next”
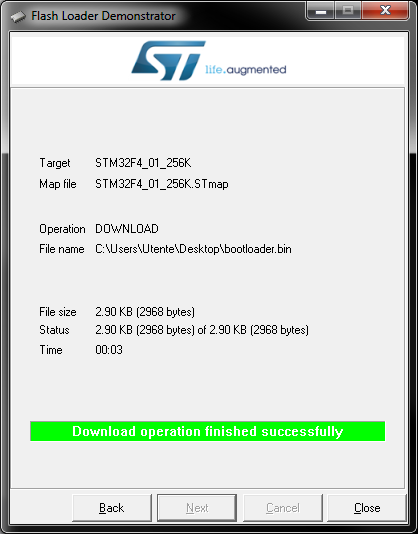
- You will see a progress bar, and when it finishes, the following screen. After this, close the program. Unplug and plug the board and try to download a sketch with the Arduino IDE.
Attached to this post there should be a bootloader.bin file. This file contains a fix that I think it could be where the problems is coming from.
Let me know if the board works again.
bootloader.bin (3.0 KB)
Thank you so much, it works now! I was afraid my board was bricked. Thanks so much for the help and very easy to follow instructions!
Hello @Ryan_Pelo,
Thanks for the feedback. I’m glad the board came back to life.
We are doing tests on our side to release this new bootloader. The definitive code should be on Github soon.